
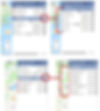
Download the 2018 Q4 Product Update Report pdf
GENERAL
• User Info Page Email Invalid Notice • Vehicle-Trailer links • Status badges on drivers • Dashboard sharing • Nearby Actors Widget • Updated posted speed limit alarms require a confirmation reading
JOBS/MAINTENANCE
• Job Filter Dashboard Module • Job Metrics Dashboard Module • Add validation options to forms • Jobs/Maintenance CSV Import • New job block/dispatch view • Update job clone to allow for editing each cloned jobs due date • Pop-up new look • Pop-up added Created By & Created Time • Pop-up hyperlink on target and assignee • Pop-up added linked vehicle and linked trailer • Added linked vehicle and linked trailer to dispatch view assignee boxes • Permission option to see Deleted jobs in list view • Updated Job Maps Pin • Jobs Map View
POV
• Add more quick comments (Drop Trailer, Drop and Hook, Breakdown, Scale Load) • Require location to be entered on ELD record inserts
GENERAL
User Info Page Email Invalid Notice
If a user is added to a send report or send alert from alarms, jobs, or maintenances, and that user’s email address is not a valid email address, OneView will show the following message: "Problems were encountered sending to this email. Please update to a valid email."


Vehicle-Trailer Links
Now when you are looking at a Vehicle in OneView, you will also see the linked trailer that has been selected by the driver operating the vehicle. On the Trailer’s information, you will now see the linked Vehicle as well.

Status Badges on Drivers
Drivers now have status badges just like assets. Green=Driving, Blue=On Duty, Not Driving, Black=Off Duty, Dark Blue=Sleeper Berth, Magenta=Waiting at Wellsite. See the driver badges at a glance in your asset tree or in the driver’s summary card.

Updated Posted Speed Limit Alarms to Require a Confirmation Reading The posted speed limit alarm includes an amount of time the asset is speeding that you set as a trigger for the alarm. The system will now require a confirmation reading after the full amount of time has passed to ensure that the asset has spent the full amount of time speeding.
Dashboard Sharing
OneView now has the ability for certain users to share dashboards across your company as needed. This is a permission you can give to a user’s group, like just to your Administrators. Those users can create dashboard tabs that can then be shared to other user groups. The people who receive the shared dashboard tabs can view them, make temporary adjustments, and hide them, but they cannot delete the dashboard or make global changes to it. Only the creator of the dashboard tab can make global changes to it.
Share Dashboard Steps
1. Click the drop-down on any tab you would like to share.
2. Click in the Search Groups to find a group to share the dashboard.
3. Click on the group to select.

4. Add as many groups as necessary. Then click save.

Any shared dashboard tab will include the shared symbol (outlined in red in this image).

Editing Restricted on Shared Dashboard Tabs
For any user who has received a shared dashboard tab, editing of the module(s) on the tab is restricted. The original creator of the tab can make changes, but the user cannot, except for temporary changes, like map view changes on the Asset Locations (Map) for example.

User Can Hide Shared Dashboard Tab – Not Delete
A user can hide a shared dashboard tab but not delete it. Also, a user can see who shared the dashboard tab with them if they click on the tab drop-down arrow.

Nearby Actors Widget
When looking at an asset on the map within OneView, if you have the Nearby Actors Widget permission, you will see a new icon that looks like a target. You will see this target icon on the top right if the map you are looking at only includes one asset, or if the map includes multiple assets, click on one asset and the summary pop-up will show the nearby actors target icon in the summary box. This new icon, when clicked, will show you which assets/landmarks are the closest to this selected asset.


Click on Nearby Actors Icon (Target Icon)
After clicking on the target icon, the map will display the nearest 5 assets of each actor class and landmark folder selected. It will include every asset class and landmark folder the first time you click this icon.

Use Asset Wrench to Narrow Results
The Asset Wrench at the top of the results list will bring up your actor class selector so that you can narrow the results to the actor classes that you want and the landmark folders that you want. For example, if you have a semi-tractor break down and you want to see which five semi-tractors are closest so you can assign someone to pick up the cargo and continue the dispatch job, narrow your results to semi-tractors.


Results Start with Nearest Assets, Expand with <+>
The map will show up to the closest five of any of the actor classes that you’ve narrowed your results to show. Use the <+> icon in the actor class header to show up to the nearest ten. This is the same for asset actor classes and landmark folders.
Assign a Job to Asset in Results List
In the results list, you will see how far each of your nearest assets or landmarks are away from your target asset. Also you will see an icon that allows you to create a job for this asset, like if it needs service, create a maintenance, or if it is a dispatch job to the nearest asset, create that dispatch job using the icon next to the asset. Icons will only appear for assets that have a driver attached to the asset. If there is no driver, the system will assume that asset is not in use today. Create any jobs through the normal tools in OneView for assets that are not currently in operation.

<4>JOBS/MAINTENANCE
Job Filter Dashboard Module + Job Metrics Dashboard Module
The new Job Filter dashboard module, paired with the new Job Metrics dashboard module gives users a new level of analytics of their jobs data. To use these tools, add a new dashboard tab and load the Job Filter dashboard module on the new tab. Next add a Job Metrics module on the same tab. You can add multiple Job Metrics modules on the same tab.


Add Validation Options to Forms
Job forms can now use data from arrival times, tank volumes, gps locations and more to validate the start, process, and completion of dispatched jobs. In addition to using system validation of data, certain form fields can be required for completion. The origin of data will be marked on the tablet, in OneView and on reports, such as overridden by driver, manual, or calculated.

Jobs CSV Import / Maintenance CSV Import
We’ve added a new upload tool to import many jobs or maintenance tickets through a CSV upload. Jobs that are uploaded with the Import button need to be the same type of job, but you will add the Name, Description, Notes, Target, Assignee, and Due Date in the spreadsheet template.

Update Job Clone to Allow for Editing Each Cloned Job’s Due Date
When cloning a dispatch job or a maintenance, you can now set a unique due date for each cloned job.

Pop-up Changes
Changes to the jobs and maintenance pop-up windows include a new look as well as new information in the Job Details area of the pop-up window. You can now see who created the job and when, and there are now hyperlinks to the target and assignee. You will now see the linked vehicle and trailer also included in the pop-up information.

Added Linked Vehicle and Linked Trailer to Dispatch View Assignee Boxes
When using the drag and drop dispatch view for Jobs, you can now see the linked vehicle and linked trailer on each assignee/driver.

Updated Job Maps Pin The Job pin for the Job Maps view is now a briefcase with a circle around it. There icon includes an outline in the color of the job status. See Jobs Map View image.
Jobs Map View
The Jobs Map View layout has changed. Now the map is on top and the filter is directly below the map. Filter jobs as needed and see the job locations on the map with new icons. You will see the status color of the job on the icon.

POV
Add More Quick Comments
Additional quick comments have been added for notes in POV. Drivers will also now see Drop Trailer, Drop and Hook, Breakdown, and Scale Load as quick notes when editing their status or adding a notes in POV.

Require Location to be Entered on ELD Record Inserts
When a driver inserts a record, POV will require the driver to enter a location for that record. Drivers will no longer be able to skip this step when inserting records.
